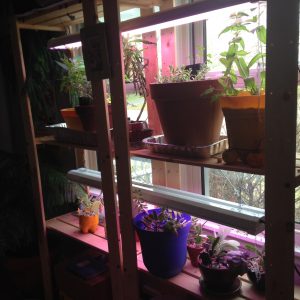
 My plant set-up, in its current state as a home for some tender refugees from the winter.
For the first time in years, I spent most of the 2014 growing season in the office instead of on a farm. However, a farmer doesn’t fade so easily. So when it came to planning my vegetable garden, I did not tread lightly. Planning began even before I landed in Illinois in February, and by March my seedlings were started in anticipation of first planting in April. I had a 1,000 square-foot plan for my backyard, and I knew I couldn’t do it on the fly.
Central to the success of my garden were healthy seedlings of my own making. In anticipation of our upcoming workshops on seed-starting and season extension, I would like to give you a rundown of my seed-starting set-up that I created for my home and will use again this coming winter. I’ll admit that I made up this plan in my head, gleaning from my years of experience and research and adding in a few new ideas along the way.
The key traits of a successful indoor seedling nursery are the following:
- Adequate and consistent light, which is probably the resource most commonly overlooked when trying to start seeds;
- Adequate heat, which is easily overlooked in houses like mine where we are mindful of keeping energy bills low and, therefore, keeping the heat to just-tolerable levels;
- Even watering, which is achieved differently from watering for regular houseplants;
- Quality seeds and soils;
- Good labeling practices.
Paying attention to these traits can guide your set-up and help you be effective in establishing seedlings. But first, you have to learn how to cheat death. Or at least, to cheat winter.
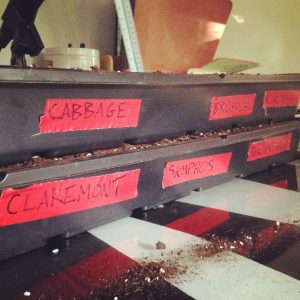 Classy labeling system.
Cheating winter requires first looking for the opportunities presented by angles of sunlight and sources of heat. When these have been identified, we can augment these opportunities to our needs. In my office at home, I have a double-wide window that faces east. This is not an ideal direction for capturing solar energy. In the Northern Hemisphere, sunlight angles in from the south and is therefore the best direction to face. Still, this was the most accessible window in the house and I never intended to have it be my only source of light. House windows are essentially never able to provide ideal light levels for production plants, so my plan was to supplement with artificial light. This spot was sufficient in that it provided some light, had a nearby electrical outlet, and was convenient in the house for watering and other tasks.
Having chosen a location and measured the width of the windows (six feet from frame to frame), I went shopping. I bought the following items:
- two sets of cheap wooden shelves, three feet wide apiece with the shelves composed of four-inch wide slats (while out on my big “new apartment” excursion to Ikea)
- two six-foot long fluorescent light fixtures (at the hardware store)
- four six-foot long “plant lights” (in the light bulb section at the hardware store)
- one 25-foot roll of 14-gauge wire (hardware store)
- two 25-foot rolls of reflective insulation (hardware store)
- duct tape (hardware store)
- Pro-Mix potting soil (hardware store)
- six 10” x 20” leak-proof seedling trays (hardware store if you’re lucky, though they may have it as part of an unnecessary kit, so you can also order from Johnny’s or another catalog)
- enough seedling cells/flats to fill the trays (same sources as the trays)
- seeds (from Johnny’s and other catalogs)
Please note: this is not a recipe! You can do things your own way. For instance, I like Pro-Mix because it’s lightweight and consistent. However, if your plants will be in the mix for much more than a month, you will need to start supplementing with some kind of fertilizer (like a fish emulsion) since Pro-Mix has essentially no nutrition baseline. And as for ordering from Johnny’s, I like them for the quality of service and product even though it’s a little pricey (also, I used to work there so I have some loyalty).
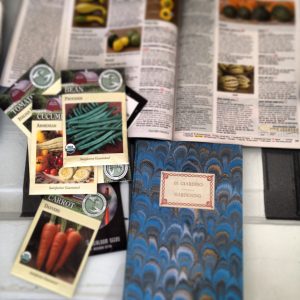 Nothing like big plans to ward away the winter blues.
The shelves were set up directly in front of the windows. Then the light fixtures were attached to the slats of the shelves with the wire, which made the height of the fixtures adjustable. However, here is where “adequate light” comes in: those light fixtures should be mere inches above your plants. If it seems too bright or like you’re going to burn your plants, don’t worry: you won’t. This might seem stupid to make note of, but the sun is powerful. It’s difficult to come close to replicating its strength. Folks often keep their lights too far from their plants, and the plants suffer. They will stretch out to try and reach the light, and in a system like mine where they are supplementing natural light, they will actually bend towards the window. This makes for fragile, unhealthy seedlings that won’t get your garden off to a strong start without a lot of extra effort, if at all.
Once my seeds and Pro-mix were planted out in their cells (a separate lesson in itself), labeled with permanent marker on duct tape, placed in the trays, and set out on the shelves, I put up the insulation. I cut the reflective insulation into pieces long enough to hang from the top of the shelves to the bottom of the lowest shelf that contained plants. I also used pieces of this material and some leftover cardboard to fill in some cracks around the edges. This was far from airtight but it held some heat (comparatively warm to the touch) and also reflected light back onto the plants. This material was secured at the top and bottom with duct tape, although this quickly wore out on the bottom as I repeatedly undid and redid it for watering. I tried tacks later on and that seemed to work pretty well.
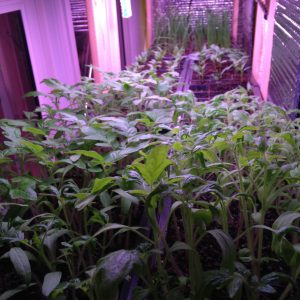 The view inside the nursery at my “sauce-in-the-make”. I wound up planting every one of these tomato, pepper, and onion seedlings.
Finally, the seeds were ready to start germinating. Before they emerged, I didn’t turn the lights on simply because there was enough light hitting them for them to get the idea. However, as soon as I saw the first sign of life, I turned the lights on when I woke up and off when I went to bed. This system was sufficient, but in the future I will get a light timer so that the schedule is more consistent. I bottom-watered the plants throughout by filling the seedling trays with about an inch of water whenever I determined they were dry. Initially, the soil took a very long time to dry because there were no plants to suck the moisture out. However, as the plants developed, the need for water grew and grew, until I was watering every one to two days.
In the end, I had strong, healthy plants that produced an awful lot of food for me and many others this season. There is much more to tell and learn but that will have to be saved for our seed-starting and season extension workshops. We hope you can join us!
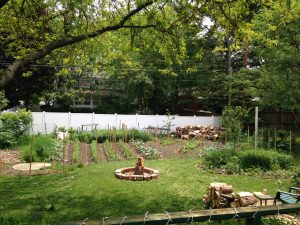 With a couple months under their belts, the seedlings have grown up and gotten to work.

