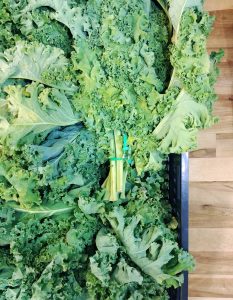
 It’s that time of year when everyone seems to be inundated with fresh, local produce. The late summer / early fall harvest just seems to keep on going and going with this continued warm weather. It’s October and it’s 90° outside…I thought central Illinois already had its week-long second summer?!?! As farmers and gardeners continue to harvest and begin to pull plants for winter planting, it seems that I’m being buried in eggplant, peppers, squash, green tomatoes, and bunching greens (kale, chard, and collards). Last year I was too busy to process all of the produce I bought or was given, and a good amount ended up going to compost (enter ashamed emoji here) but this year is going to be different!
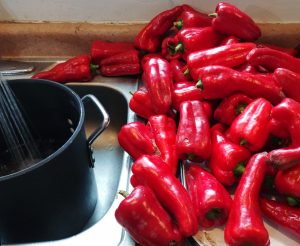 Typically this would be one of those declarations akin to New Year’s resolutions and “I’m going to start going to the gym again!”, but this year really is different because I’ve already started processing things. I know, right, CRAZY! Rey and I were determined to get a head start on everything and so far we’ve gotten through quite a bit of produce, prepped it, par-cooked it, and freezer bagged it. There are some really simple ways to prepare and store fresh produce for later use that anyone can do at home, even if someone gives you 30 pounds of peppers.
One of the things Rey and I are focusing on this year is how to store long-term that doesn’t involve canning. We love canning, but if you’re trying to get through a lot of produce, it just isn’t an efficient use of your time. This is especially true if you have a freezer you rarely ever use except for storing meat and the ice cream you bought on impulse and then forgot about. Who am I kidding, no one forgets about ice cream. So freezing is our go-to storage technique this fall; haters be damned.
Before freezing, however, there are three techniques you’ll need to master well enough that you can prepare and freeze almost anything, even greens: grilling/roasting/charring, sautéing, and blanching.
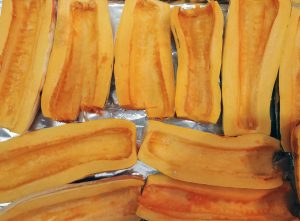 Since we’ve predominately gotten a lot of peppers and eggplant, we’ve been using our oven almost every evening to roast or char the suckers. Roasting peppers is pretty easy. Rub them in oil (I prefer leaving them whole), place them on a baking sheet, and put them under the broiler (you can also place them on a hot grill). You want the skin closest to the heat source to blacken and wrinkle. Rotate the peppers so that you get the charred skin all over (it doesn’t have to be uniformly blackened, but you want the skin to look wrinkled as if it is no longer attached to the flesh underneath). Once they are cooked, pull them out of the oven or off of the grill and immediately place them in a bowl and tightly cover the bowl with cling wrap. If you prefer the paper bag method, you can use that as well.After they’ve sat in the bowl for a while and are cool enough to touch, pull them out and remove the stem, seeds, and skin (I suggest wearing gloves). You can then bag the roasted peppers in freezer bags, remove any air, flatten, and freeze. Flattening the bag into a square or rectangle (i.e. the shape of the bag) will allow you to maximize your freezer space. If your freezer is large enough you can even freeze them then store them upright like records to make them easier to access than a stack of freezer bag “pucks.” If you anticipate needing only small amounts at a time, buy smaller freezer bags and freeze the peppers (or anything really) in amounts that you think you would want to thaw all at once. Peppers can also be sauteed and frozen in the same way. Tip: LABEL EVERYTHING.
With eggplant, you’ll want to char the eggplant in the same way. You can roast the eggplants in the oven, grill the eggplant whole on an outdoor grill, or put the eggplant directly on the eye of your stove (assuming you have a gas stove) and “grill” it that way. A quick tip for grilling on a gas stove: put foil down under the grate around the eye to prevent any drippings from becoming a burnt on mess. Once you’ve blackened the eggplant completely, remove the soft flesh and freeze as is, puree and freeze, or turn it into Baba Ganoush and freeze.
Also, anything can be turned into soup and frozen, so if you don’t want a ton of roasted or blanched veggies in your freezer just think SOUP, SOUP, SOUP. Roasting or grilling and then freezing works for eggplant, peppers, squash, onions/leeks, fennel, or pretty much anything you would typically grill or roast, just remember that the freezing and thawing process still has some effect on the structure of the vegetables even though you’ve removed most of the water from them.
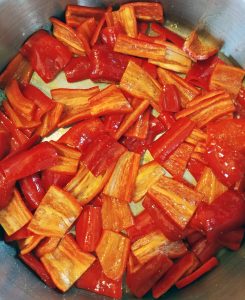 Sautéing follows many of the same rules as roasting but tends to be best used if you want to sauté something and combine flavors before freezing. For example, if you have a ton of onions that you want to freeze and you typically use garlic with sauteed onions in nearly everything you make (I’m unquestionably guilty of this), you would want to just sauté the onions with the garlic, caramelize them, and then freeze them as you would roasted veggies.The final preparation technique you want to have in your arsenal is blanching. This is definitely the easiest of the three, but there are some tricks to be aware of so that your thawed product comes out the way you want it. Blanching works for winter squash, broccoli, kohlrabi, asparagus, radishes, cauliflower, beans, peas, corn, the list goes on and on. Breakdown the vegetable you are going to use if it is large. Break a head of broccoli down into florets, winter squash down into cubes (with rind and seeds removed), corn should be removed from the cob, etc. Other veggies, like beans, peas, asparagus, and radishes, can be left whole. Bring a pot of water to a boil. Add the veggies so they are completely submerged and turn the burner off. If you can’t fit all of the veggies in the pot at once you’ll have to do two or more batches as the veggies need to be submerged but you don’t want the water to overflow.
Another way to do it is to boil a large pot of water and have the veggies in bowls and pour the boiling water into the bowls and keep the veggies as submerged as possible. Each veggie will be different, some like corn, peas, beans, and asparagus will cook faster than broccoli and winter squash so watch your time. You’re only par-cooking them before freezing so you will only need to have them in boiling water for a couple minutes. After they are par-cooked, strain the veggies through a colander in the sink, and run cold water over them to cool them down and halt the cooking process. Let them dry a bit in the colander then line a baking sheet with parchment or wax paper and spread the veggies out on the baking sheet and place them in the freezer. This allows you to freeze the pieces individually before you bag them, so if you only need a few florets from a bag, you aren’t trying to break off a piece from a big frozen mass of broccoli. If you are planning to thaw the whole mass all at once and don’t care about what they look like then go ahead and just bag them after blanching and freeze, it just comes down to what you want to use them for in the future. The same freezing technique can be used for fruit, but since you typically freeze fruit raw, you’ll get a lot more moisture coming from the fruit when you thaw it and it won’t look anything like fresh fruit.
So those are some of the tips and techniques that Rey and I have been using this year to process all of the amazing fresh, local produce we’ve gotten so we can use it through the winter. If you are interested in other cooking and storage techniques, I encourage you to check out our Specialty Crop Card Series which has preparation, cooking, and storage techniques for 15 local specialty vegetable crops. Also, feel free to leave comments or questions and I will try to answer any of your food-related questions.

